Watercolor Landscapes in Procreate: A Beginner`s Guide
This guide is designed for beginners eager to explore watercolor landscapes in Procreate. It breaks down the basics, from setting up your canvas to mastering watercolor techniques digitally. Step by step, you’ll learn to create stunning landscapes that mimic the fluidity and transparency of traditional watercolor. Whether you’re new to digital art or transitioning from physical to digital, this guide provides the tools and tips you need to get started.
Table of Contents
Toggle
Essential Steps to Start with Watercolor Landscapes in Procreate
To begin creating watercolor landscapes in Procreate, focus on initial steps that lay a solid foundation. First, familiarize yourself with Procreate’s interface and available watercolor brushes. Selecting the right brush plays a critical role in achieving the desired watercolor effect. Next, practice blending colors to understand how they interact on a digital canvas, resembling traditional watercolor techniques. Lastly, setting up your canvas with a thoughtful composition will guide your artistic process. These basic steps are fundamental in starting your watercolor landscape project effectively.
Layering Techniques to Enhance Watercolor Landscapes in Procreate
Layering is a crucial technique in achieving depth and dimension in watercolor landscapes. In Procreate, you can create multiple layers, each with unique properties like opacity, blending modes, or masks. Experiment with layering different colors and textures to create the illusion of light and shadow on your landscape. You can also use layers to add fine details, such as individual leaves or blades of grass. With practice, you’ll learn how to use layering to enhance your watercolor landscapes in Procreate.
Adding Depth and Realism with Blending Modes
Blending modes are a powerful tool in creating realistic watercolor effects in Procreate. There are various blending modes available, each with a different effect on the colors and layers in your artwork. Experiment with different modes to see how they affect the intensity and transparency of your colors. For example, using the “multiply” blending mode can create a darker and more saturated color, resembling traditional wet-on-wet watercolor techniques. Remember to use blending modes strategically to add depth and realism to your digital watercolor landscape.
The Importance of Composition in Watercolor Landscapes
A well-composed watercolor landscape is visually appealing and can guide the viewer’s eye through the artwork. In Procreate, you can use tools like the grid or symmetry to help create a balanced composition. Pay attention to the placement of your focal point and use elements like foreground, midground, and background to create depth. Remember, the rule of thirds can also be applied in digital art – try placing your focal point at one of the intersecting points for a more interesting composition.
Using Brushes and Textures to Enhance Your Watercolor Landscapes
Procreate offers a wide variety of brushes and textures that can be used to add texture and depth to your digital watercolor landscapes. Use different brush strokes and textures to create realistic foliage, water, or clouds. Don’t be afraid to mix and match different brushes and experiment with layering for a more interesting effect. You can also import your own custom brushes or textures to add a unique touch to your artwork.
Simplifying Watercolor Landscape Creation
Start with simple scenes. Focus on basic shapes and colors. Avoid getting lost in details. Practice with fewer layers. Use presets for convenience. Gradually, incorporate more complexity. Study and observe real landscapes for inspiration. Experiment with different color palettes to create different moods and atmospheres in your artwork.
Keeping a Consistent Color Palette
Having a consistent color palette throughout your digital watercolor landscape can help tie the elements together and create a cohesive look. You can achieve this by using a limited number of colors or creating a color scheme beforehand. Procreate also offers the option to save and reuse color palettes, making it easy to maintain consistency in your artwork.
Adding Details and Final Touches
Once you have the basic elements of your watercolor landscape in place, it’s time to add some extra details and final touches. This can include adding textures, highlights, shadows, or using blending modes to create a more dynamic effect. Remember to keep these details subtle and not overpower the overall composition of your artwork.
Mastering the Basics of Watercolor Landscapes in Digital Art
To master the basics of watercolor landscapes in digital art, focus on understanding and practicing core techniques. Begin with learning how to control your digital brushes to mimic the flow and blend of real watercolors. Develop a deep understanding of color theory to effectively use palettes that evoke the desired mood in your landscapes. Pay attention to the composition and the interplay of light and shadow to bring depth to your scenes. Consistent practice, coupled with studying real-world landscapes and experimenting with various styles and techniques, will pave the way for proficiency in digital watercolor art.
Beginner’s Strategies for Effective Watercolor Scenery in Procreate
To integrate basic watercolor techniques into your landscape artwork in Procreate, start with mastering the wet-on-wet and wet-on-dry methods. The wet-on-wet technique allows for seamless color blending, creating soft edges and subtle color transitions. Use this for backgrounds or to suggest distant elements. The wet-on-dry method, on the other hand, is perfect for detailed work and sharper edges. It’s ideal for defining foreground objects or adding texture. Experiment with layering colors and varying your brushstrokes to replicate the unpredictability and fluidity of traditional watercolors. Incorporating these techniques will add realism and depth to your digital watercolor landscapes.
From Concept to Creation: Building Your Landscape Art Skillset
Transitioning from concept to creation in landscape art involves a set process. Start by gathering inspiration; look at photos, real scenes, or artwork by others. Sketch your ideas to define the landscape’s basic structure. Employ digital tools for sketch refinement, laying down the foundational shapes and lines. Select your colors thoughtfully, focusing on mood and time of day. Apply the watercolor techniques discussed earlier, like wet-on-wet for backgrounds and wet-on-dry for details and textures. Finally, refine your piece by adjusting contrast, saturation, and details to enhance the landscape’s realism and emotional impact. This methodical approach turns initial concepts into compelling digital watercolor landscapes.
Exploring Advanced Techniques and Tools
Advance your digital watercolor landscapes by exploring more sophisticated techniques and tools in Procreate. Focus on leveraging layer properties to enhance transparency and depth. Incorporating texture brushes can add a tactile feel, reminiscent of the granular quality of pigments on watercolor paper. Experiment with blending modes to achieve luminous effects and dynamic light conditions. Mastery of clipping masks and alpha locks will also allow for intricate detailing and precise control over your compositions. Pushing the boundaries with these advanced techniques will elevate the intricacy and emotiveness of your digital watercolor art.
Transform Your Digital Art with Procreate Watercolor Brushes of AF Brush Packs
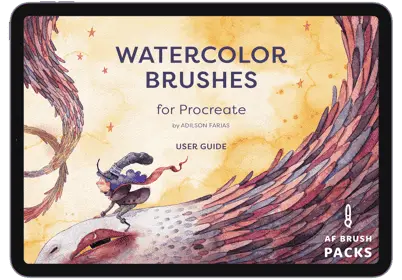
Elevate your watercolor digital art effortlessly with Procreate’s watercolor brush collection. Designed with the digital artist in mind, these brushes perfectly capture the essence and beauty of traditional watercolors, enabling you to produce lifelike and breathtaking art pieces on your iPad.
Explore an extensive variety of brush styles, from delicate washes and seamless blenders to richly textured brushes. Each one offers the chance to add intricate depth and dimension to your creations. With customizable settings, including opacity and flow, you gain unparalleled control over every stroke and blend, pushing the boundaries of your digital art.
Experience the transformative effect on your art. Elevate your creations and capture the imagination with Procreate Watercolor Brushes of AF Brush Packs!