Mastering Opacity and Flow in Procreate Brushes: A Beginner’s Guide
Procreate has revolutionized digital art, offering artists an expansive toolkit that mimics traditional mediums with astonishing accuracy. Among its most nuanced features are the opacity and flow settings for brushes, which when mastered, can elevate your artwork to new heights. This post will explore these settings in detail, providing a foundation for beginners and advanced techniques for more experienced artists.
Table of Contents
Toggle
Fundamentals of Opacity and Flow Settings for Beginners
Opacity and flow are fundamental brush settings that control how paint is applied to your canvas. Opacity determines the transparency of the brush stroke, while flow controls the speed at which the paint is applied, affecting the buildup of color. Understanding these settings is crucial for achieving desired effects in your digital artwork.
Understanding Opacity
Opacity is measured on a scale from 0 to 100%, with 0% being completely transparent and 100% being completely opaque. The opacity setting essentially controls how much of the underlying layers or canvas will show through your brush stroke. This is especially important when working with multiple layers, as adjusting the opacity can create depth and variation in your artwork.
Tips for Utilizing Opacity in Illustrations
- Layering: Start with lower opacity levels to create base layers, gradually increasing opacity for details and depth.
- Soft Edges: Use low opacity settings on hard-edged brushes for softening transitions or creating gentle gradients.
- Highlights and Shadows: Apply high opacity for sharp highlights and deep shadows to add contrast and dimension.
- Texture: Experiment with varying opacity levels on textured brushes to achieve a more dynamic effect.
- Opacity Shortcut: Familiarize yourself with opacity shortcuts or gestures in Procreate to swiftly adjust levels while working.
Understading Flow
Flow, on the other hand, controls how much paint is applied with each brush stroke. This setting is especially useful for creating smooth and controlled transitions of color. A higher flow setting will apply more paint with each stroke, while a lower flow setting will create more gradual buildup of color.
Tips for Utilizing Flow in Illustrations
- Smoothing: Lowering the flow setting can help create smoother brush strokes, ideal for blending colors or creating gradients.
- Detail Work: Higher flow settings are useful for adding fine details to your artwork, such as hair strands or intricate line work.
- Variety: Experiment with different flow levels on various brushes to achieve a variety of effects in your illustrations.
- Flow Shortcut: Just like opacity, learn the shortcuts or gestures for adjusting flow in your chosen illustration software to save time and streamline your workflow.
Finding the Perfect Balance
When it comes to utilizing opacity and flow in illustrations, it’s all about finding the perfect balance. Too much opacity may result in a flat and unrealistic look, while too much flow can make colors appear muddy and unrefined. It’s important to experiment and find the right combination of settings for each individual piece of artwork. With practice, you’ll develop a sense of how opacity and flow can work together to create dynamic and visually appealing illustrations.
Balancing Transparency and Coverage for Realistic Watercolor Effects
Watercolor effects in digital art require a delicate balance between transparency and coverage. By adjusting the opacity, you can mimic the translucent nature of watercolor paint, while the flow setting allows you to control how much paint is applied with each stroke, replicating the fluidity of watercolor on paper. With the right balance of opacity and flow, you can achieve realistic watercolor effects in your digital illustrations.
Creative Applications of Opacity in Layering
Layering is a technique where different levels of opacity are used to build up color and detail gradually. This method can add depth and dimension to your artwork. By varying the opacity of each layer, you can create intricate effects, such as shadows and highlights, that give your art a realistic appearance.
Flow Control Techniques for Smooth Gradients and Washes
Achieving smooth gradients and washes is possible by mastering flow control. A lower flow setting allows for a gradual application of color, making it easier to blend different hues seamlessly. This technique is particularly useful for backgrounds or creating a soft transition between colors.
Experimentation and Practice: Finding Your Unique Style
Exploring different settings and combinations of opacity and flow can lead to the discovery of unique styles and techniques. Don’t be afraid to experiment with these settings to see how they affect your artwork. Practice regularly to become comfortable with these tools and find your artistic voice.
Strategies for Mixing Brush Types and Their Impacts on Opacity
Procreate offers a wide variety of brush types, each with its characteristics. Mixing brush types can produce complex textures and effects. Understanding how each brush interacts with opacity and flow settings will allow you to use them more effectively in your artwork.
The Interplay between Opacity, Flow, and the Canvas Texture
The texture of your canvas can significantly impact how opacity and flow settings manifest in your artwork. A textured canvas can add depth to your strokes, enhancing the effect of these settings. Experiment with different canvas textures to see how they change the appearance of your brushwork.
Real-World Inspirations for Digital Brush Settings
Drawing inspiration from the real world can help you apply these digital tools more effectively. Observe how light and shadow play on different surfaces, and try to replicate these effects using opacity and flow settings. Studying traditional painting techniques can also provide valuable insights into how these settings can be used to mimic real-world media.
Hacks and Tips for Translating Real-World Inspiration into Digital Art
Observe Nature
Start by observing nature. Look at the way light plays on leaves, or how shadows form under different conditions. Nature is an endless source of inspiration.
Carry a Sketchbook
Always carry a sketchbook. Jot down ideas or sketch scenes that catch your eye. These can later be used as references for your digital work.
Use Photography
Photography is a powerful tool. Take photos of textures, scenes, or elements that intrigue you. These can be directly used as textures in your digital art or serve as a basis for your creations.
Study Art
Study both traditional and digital art. Understand the techniques used by the masters. Try to apply these techniques in your digital art using Procreate’s various tools.
Experiment Continuously
Finally, experiment. Use Procreate’s features in unconventional ways. Mix brushes, adjust opacity and flow, and see how these changes affect your art. Your unique style will emerge from experimentation.
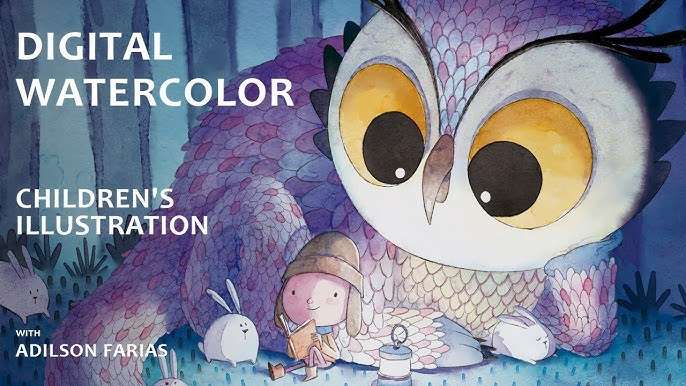
Elevate Your Art with Procreate Watercolor Brushes from AF Brush Packs
Our Procreate Watercolor Brushes, part of the AF Brush Packs collection, are designed for artists who demand realism and versatility in their digital creations. Crafted with precision, these brushes emulate the fluidity and subtlety of watercolor on paper, allowing for a seamless transition from physical to digital art.
Enhance your digital paintings with brushes that offer a wide range of textures and stroke responses, from delicate washes to bold, saturated strokes. Ideal for artists at any skill level, these brushes invite you to explore new horizons in your artwork.
Elevate your digital art today with our meticulously curated watercolor brushes.