Mastering Skin Tones and Textures in Procreate
Creating lifelike skin tones and textures in Procreate can be one of the most challenging yet rewarding aspects of digital art. While achieving a realistic and natural appearance may seem daunting, especially in a digital format, the right techniques and tools can transform your work. In this guide, we’ll share valuable tips and tricks to help you master skin tones and textures, elevating your digital art to new levels of realism and beauty.
Table of Contents
Toggle
Understanding Color Blends for Realistic Tones
To achieve realistic skin tones in digital watercolor, mastering color blending is essential. Start with a limited palette to avoid overwhelming combinations. Focus on primary colors—red, yellow, and blue. By mixing these, you can create a broad range of skin tones. Pay attention to the undertones of the skin you’re portraying, which can lean towards cool or warm. Adding layers with different opacities can mimic the natural variations and subtleties of human skin. Experimentation and observation are key. Look at reference photos to understand how light influences skin color in various environments.
The Essentials of Watercolor Portrait Mastery in Procreate
Utilizing Procreate’s Technologies for Enhanced Watercolor Effects
Procreate offers an assortment of tools and features designed to simulate watercolor techniques digitally. Understanding these can significantly improve your portrait results. Begin with the brush library; select brushes that mimic the behavior of watercolor on paper. Brushes labeled as “wet” or “aqueous” can produce the desired fluid and blending effects characteristic of watercolor.
Leverage layers and blending modes to build depth and texture. The “multiply” and “overlay” modes are particularly useful for creating realistic skin textures. Use layer opacity to control the intensity of color and create the illusion of watercolor’s transparency.
Experiment with Procreate’s color drop feature for seamless blending. This can help in achieving smooth gradients, essential for skin tones. Additionally, the smudge tool is invaluable for blending colors on the canvas, replicating the effect of water spreading pigments.
Achieving Realism in Skin Tones with Digital Watercolor Brushes
Lighting and shadows play a crucial role in creating realistic watercolor portraits in Procreate. Proper manipulation of these elements can add dimension and depth, bringing the portrait to life. Start by determining your light source; understanding where the light originates will guide your shading and highlighting efforts.
For shadows, use a soft brush to gently apply darker shades on the opposite side of the light source. Remember, shadows are not just gray or black; they often carry the hues of the objects around them. Subtly blend these colors to achieve a more natural look.
Highlighting involves adding lighter tones on areas where the light directly hits. It’s essential for indicating texture and form within the portrait. Use a lighter opacity to build up these highlights gradually, ensuring they blend seamlessly with the base colors.
Always observe how light interacts with different skin tones in real life. This observation will improve your ability to simulate realistic lighting effects in your digital watercolor portraits.
Simplified Strategies for Capturing Lifelike Textures in Portraits
Achieving lifelike textures in digital portraits requires a focused approach. Begin with observing real skin. Notice its variance, from smooth areas to textures marked by pores, lines, or scars. In Procreate, utilize texture brushes that mimic these characteristics. Experiment with brush settings to match the roughness or softness of the skin in different areas.
Layering plays a critical role. Start with a base layer capturing the general skin tone. Add layers for texture, shadows, and highlights. This method offers control, allowing adjustments without affecting the entire portrait.
Incorporate blending for realism. Subtle gradients and transitions between light and dark areas mimic the way light interacts with skin. Avoid overblending to retain texture depth.
Lastly, practice is key. The more you experiment with textures and observe their real-world counterparts, the more intuitive capturing them in your artwork becomes. Keep references handy, and continually refine your techniques for lifelike results.
The Art of Blending and Layering Colors for Natural Skin Tones
The Art of Blending and Layering Colors for Natural Skin Tones
Creating natural skin tones in digital art is both a science and an art. It begins with understanding the fundamental color theory—recognizing that skin tones are not a single color but a blend of many. Start by selecting a base color. Then, layer additional colors to reflect the complexity of human skin. This includes undertones (pink, yellow, olive, or red) and the varying effects of light and shadow.
Layer colors gradually, starting from darker shades to lighter highlights. Remember, the goal is to mimic how light naturally interacts with skin. Pay attention to the anatomy and how different parts of the body might receive light or cast shadows differently.
Use a soft brush for blending to create smooth transitions between shades. However, be cautious not to overdo it; retaining some degree of texture is crucial for realism.
In practice, this process involves a lot of experimentation and adjustment. It requires an artist to constantly assess, tweak, and sometimes even restart the blending process to achieve the desired outcome. Remember, patience and persistence are key.
Key Brushes and Settings for Realistic Watercolor Skin in Procreate
Selecting the Right Brushes and Adjusting Settings in Procreate for Watercolor Effects
To create realistic watercolor skin tones in Procreate, choosing the right brushes is critical. Opt for brushes designed to mimic the spread and texture of real watercolors. These brushes usually have a certain degree of transparency and fluidity, allowing for the blending and layering needed to achieve naturalistic skin tones.
Adjust brush settings for maximum control. This includes tweaking the brush size for broader washes or finer details, adjusting the opacity for layering colors without losing the base, and configuring the flow to simulate the watercolor’s fluidity. Experiment with the pressure sensitivity to ensure strokes vary in intensity, akin to traditional watercolor techniques.
Remember, the goal is to replicate the unpredictability and subtleness of watercolor on digital canvas, allowing for soft, seamless transitions between colors and tones. Keep experimenting with different brushes and settings to find what best suits your style and the specific needs of the project at hand.
Introducing AF Procreate Watercolor Brushes
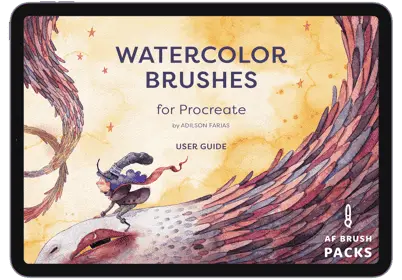
Elevate your digital artistry with AF Brush Packs, specifically designed for creating realistic watercolor effects in Procreate. With our meticulously crafted watercolor brushes, artists gain the power to replicate the delicate nuances of traditional watercolor with astonishing accuracy. These brushes are not just tools; they are gateways to a realm where digital and traditional artistry converge.
Our watercolor brush collection offers unparalleled transparency and fluidity, ideal for achieving naturalistic skin tones and textures. Adjust settings effortlessly to suit broad washes or the finest details. Leveraging Procreate’s advanced features, our brushes respond intuitively to your touch, mimicking the variability and depth of real watercolor strokes.
Choose AF Brush Packs for your digital watercolor projects. Experience a seamless blend of control and unpredictability, allowing for artistic expression that transcends the digital medium. Transform your art with the subtleness and sophistication of watercolors. Try AF Brush Packs today and revolutionize the way you create.