How to use paper texture on procreate?
Creating digital art can sometimes feel a bit sterile, lacking the tactile quality of traditional media. One way to bridge this gap is by incorporating paper textures into your digital drawings on Procreate. This technique can add depth, character, and a more organic feel to your artwork, making it visually richer and more engaging. In this guide, we will walk you through the steps to seamlessly integrate paper texture in Procreate, ensuring your digital pieces resonate with the warmth and authenticity of traditional art. Whether you’re a seasoned artist or just starting out, these tips will enhance your Procreate projects and inspire your creative journey.
Table of Contents
Toggle
Get a paper picture or purchase a paper texture
Free Paper Textures Online
Numerous websites offer free downloadable paper textures. Sites like Unsplash, Pexels, and Pixabay have high-quality, royalty-free textures that can be used for personal and professional projects. Simply search for ‘paper texture’, and you’ll find a range of options.
Purchase Special Textures
For more unique and high-resolution textures, consider purchasing a special textures developing by artist. These textures are often more detailed and can provide a distinct look for your artwork.
Take a look in the AF Brush Packs Paper Texture for Procreate!
Scan Your Own Paper
If you have a specific type of paper in mind, such as watercolor paper or handmade paper, scanning it can provide a very personalized texture. Using a high-resolution scanner will capture the details and nuances, giving you complete control over the texture you want to use.
Use Photos of Paper
Sometimes, a quick photo of a textured paper surface can serve the purpose. Ensure the lighting is even to avoid shadows and reflections. You can edit the image using photo editing software before importing it to Procreate.
Locate the file in your iPad's downloads
Files App
If you have downloaded the texture file directly onto your iPad, you can use the Files app to locate it. Open the Files app and navigate to ‘Downloads’ under the ‘Locations’ tab. Your downloaded paper texture should be visible here.
iCloud
If you have iCloud sync enabled on your iPad, your downloaded file may automatically appear in your iCloud Drive under ‘Downloads’. From there, you can easily access and import it into Procreate.
AirDrop
If you have downloaded the paper texture file on another Apple device or received it from someone else, you can use AirDrop to transfer it to your iPad. Simply select the file and choose ‘Share’ then select your iPad from the available devices to send it via AirDrop.
Select a Paper Texture
Import from Files
In Procreate, select the ‘Brush’ icon on the top toolbar and then select the ‘Image’ tab. Tap on ‘Import’ and choose ‘Files’. Navigate to your downloaded paper texture file and tap on it to import it into Procreate.
Drag and Drop
If you have multitasking enabled on your iPad, you can use the drag and drop feature to easily import your paper texture into Procreate. Open both the Files app and Procreate side by side, then simply drag the paper texture file from Files onto the canvas in Procreate.
Add a New Layer
To avoid altering your original paper texture, it is recommended to add a new layer on top of it before starting your artwork. Select the ‘Layer’ icon on the top toolbar and then select ‘Add’. This will create a new layer on top of your paper texture where you can draw or paint without affecting the texture below.
Adjusting the Paper Texture
Once you’ve drawn on the new layer, go to the “Adjustments” icon and choose “Hue, Saturation, and Brightness.” Tweak the sliders to get the paper texture just right. Feel free to experiment with the options of configurations for varied effects.
Remove Unwanted Areas
Sometimes, the paper texture may cover parts of your artwork that you don’t want. To remove these unwanted areas, select the ‘Erase’ tool and use a soft brush to gently erase the texture in those areas.
Blend the Layers
To create a more cohesive look between your artwork and the paper texture, you can blend the layers together. Select the ‘Layer’ icon on the top toolbar and choose ‘Blend’. Here, you can experiment with different blending modes to achieve your desired effect. Some popular blending modes for paper textures include ‘Overlay’, ‘Multiply’, and ‘Soft Light‘.
Incorporate Additional Layers
For more depth and texture, you can add additional layers on top of your paper texture layer. These layers can include elements like watercolor paint splatters, ink drips, or handwritten text. Just be sure to consider the overall composition and not let these elements overpower the paper texture.
Conclusion
Using paper textures can add a unique and artistic touch to your digital artwork. By adjusting, erasing, blending, and incorporating additional layers, you can create a more cohesive and visually appealing piece. Have fun experimenting with different techniques and make your artwork stand out with the added dimension of paper texture. Happy creating! So go ahead and use these techniques to enhance your next digital art project and see the difference it makes! Remember, don’t be afraid to play around with different configurations to achieve your desired look.
Take a look in the AF Procreate Watercolor Brushes with Bonus Paper Textures
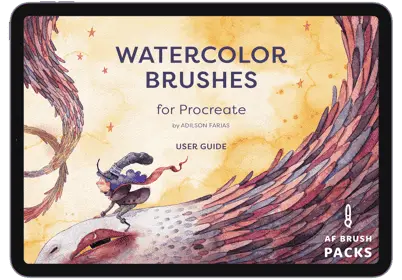
When it comes to elevating your digital artwork, AF Brush Packs stand out as a trusted brand among artists. Our Procreate Watercolor Brushes, complemented by bonus paper textures, are designed by the eyes of an artist to bring an unparalleled level of realism and depth to your creations.
Invest in AF Brush Packs today and experience the difference that quality digital tools can make. Transform your creative process and produce artwork that truly stands out. With AF Brush Packs, you’re not just purchasing a product—you’re investing in your artistic journey.

