Creating Magical Creatures with Procreate’s Watercolor Brushes
In this piece, we’ll navigate the art of designing mesmerizing, mythical beings with Procreate’s dynamic watercolor brushes. Our goal is to furnish both novices and adept digital artists with a clear, methodical strategy to infuse life into their visionary works. By tutorial’s end, you’ll possess an in-depth grasp of Procreate’s arsenal, mastering everything from initial sketches to complex watercolor methods. Whether aiming to elevate your digital art collection or dive into new creative realms, this comprehensive manual promises to ignite your imagination and arm you with the vital techniques for your art odyssey.
Table of Contents
Toggle
Step-by-Step Guide to Creating Magical Creatures with Procreate’s Watercolor Brushes
Set Up Your Canvas:
Before diving into the creative process, it’s essential to set up your canvas correctly to ensure a smooth workflow. Follow these steps to get started:
- Open Procreate: Launch the Procreate app on your iPad.
- Create a New Canvas: Tap the ‘+’ icon at the top right corner of the Gallery to create a new canvas. For detailed, high-resolution artwork, we recommend setting your canvas size to at least 3000 x 4000 pixels.
- Adjust the DPI: Set the DPI (Dots Per Inch) to 300 for print-quality resolution. This ensures your artwork will be crisp and clear both on screen and in print.
- Select the Color Profile: Choose ‘RGB’ for digital artwork or ‘CMYK’ if you intend to print your images. RGB is generally preferred for online sharing as it supports a broader color range.
- Name Your Canvas: It’s good practice to name your canvas right from the start. Tap the ‘Canvas’ tab, then ‘Actions,’ and enter a descriptive name for your magical creature project.
By meticulously setting up your canvas, you lay a solid foundation for your artwork, aiding in both the creative process and final output quality. Once these settings are optimized, you’re prepared to embark on crafting your enchanting mythical beings with optimal tools and specifications.
Gather Your References:
Having the right references is crucial for creating captivating and realistic magical creatures with Procreate’s watercolor brushes. This step ensures that you have a visual guide to draw inspiration from, enhancing the authenticity and imaginative quality of your artwork. Here’s how to efficiently gather references:
- Research Different Mythologies: Dive into various mythologies, such as Greek, Norse, or Eastern folklore, to find unique and inspiring magical creatures. Websites, books, and digital libraries can provide rich details and imagery.
- Use Online Image Libraries: Websites such as Shutterstock, Unsplash, and Pinterest are excellent resources for high-quality images. Search for terms like “mythical creatures,” “fantasy animals,” or “watercolor art” to find relevant references.
- Compile a Mood Board: Create a mood board in Procreate or a separate app like Pinterest or Milanote. Collect a variety of images, including real animals, mythical creature illustrations, and environmental elements that inspire your magical creature’s habitat and characteristics.
- Explore Nature: Sometimes, the best inspiration comes from real life. Study the anatomical features and textures of real animals, birds, and insects. Pay attention to how light interacts with their bodies and textures, which will help you mimic these effects with watercolor brushes.
- Visit Art Galleries and Museums: Art galleries and museums often have exhibits featuring mythical creatures and folklore. Take photos and notes of any inspiring pieces, paying attention to artistic interpretations and styles that you can incorporate into your work.
- Engage with Online Communities: Join forums or social media groups centered around digital art and fantasy illustration. Platforms like DeviantArt and Instagram can offer a wealth of inspiration and feedback from fellow artists.
By meticulously gathering and organizing your references, you lay a strong foundation for your creative process. Each reference will serve as a cornerstone for developing your magical creatures, ensuring that they appear both imaginative and grounded in a sense of reality. Next, let’s move on to sketching and detailing your mystical beings with Procreate’s versatile tools.
Outline the Basic Shape:
To begin outlining the basic shape of your magical creature, it is essential to understand some fundamental principles of illustration. Here, we will cover the key aspects you need to study and apply to bring your creature to life:
- Anatomy and Proportions:
- Study the skeletal and muscular structures of various animals. Understanding how bones and muscles work together will help you create more realistic and dynamic creatures.
- Practice drawing basic shapes like circles, ovals, and rectangles to construct the preliminary framework of your creature. This technique helps ensure that the proportions are accurate.
- Gesture Drawing:
- Gesture drawing captures the essence and movement of a subject with quick, expressive lines. This practice is crucial for creating poses that convey life and energy.
- Set a timer for 30 seconds to 2 minutes and sketch your creature in different poses. Focus on the flow and movement rather than details.
- Silhouette:
- A strong silhouette ensures that your creature is easily recognizable, even in shadow form. Simplify your drawing to its most basic outline to test its clarity and readability.
- Adjust the silhouette as needed to ensure it stands out and communicates the overall shape and character of your creature effectively.
- Line Quality:
- Varying line thickness can add depth and interest to your drawings. Use thicker lines for the outer contours and areas closer to the viewer, while thinner lines can depict details and elements further away.
- Practice making confident, clean lines rather than sketchy, hesitant marks.
- Basic Shapes and Forms:
- Break down complex parts of your creature into basic shapes (cylinders, spheres, cubes) to construct its form. Combining these shapes helps to build a more 3-dimensional and solid figure.
- Focus on ensuring these forms are consistent with the perspective and anatomy of your creature.
- Perspective:
- Study the basics of one-point, two-point, and three-point perspective. These concepts will help you place your creature in a believable space.
- Practice drawing your creature from various angles using these perspective principles to enhance its dynamic presence.
- By mastering these illustration fundamentals, you will be well-equipped to outline the basic shape of your magical creature. Incorporating these principles will ensure that your creation is not only imaginative but also visually compelling and structurally sound. Next, we’ll proceed to adding finer details and textures using Procreate’s versatile tools.
Adding Details to Your Sketch:
Now that you have established a strong foundational outline of your magical creature, it’s time to delve into the finer details and textures. This stage will elevate your sketch from a basic structure to a fully realized piece of art. Here are some key steps to follow:
Texture Mapping:
- Research Similar Textures: Use the internet to find references of textures similar to those you want to apply to your creature. This could include animal skins, scales, fur, feathers, or even fantastical elements like dragon scales or mystical runes.
- Apply Realistic Patterns: By studying these textures, you can draw more realistic patterns and integrate them seamlessly onto your creature’s surface. For example, if your creature has scales, observe how real reptile scales overlap and vary in size and shape depending on the body part.
- Layering Techniques:
- Utilize Layers in Procreate: Organize your work by creating different layers for various textures and features. This allows you to add shadows, highlights, and intricate details without disrupting the rest of your drawing.
- Blend Modes: Experiment with Procreate’s blend modes to achieve more natural transitions between different textures and features.
- Detail Enrichment:
- Fine Lines and Small Features: Use finer brushes to add small details such as wrinkles, pores, and tiny hair strands. These details can significantly enhance the realism and depth of your creature.
- Enhancing Depth with Shadows and Highlights: Properly placed shadows and highlights can make elements like raised scales, bulging muscles, or deep furrows pop, giving your creature a more three-dimensional appearance.
- Color Application:
- Base Colors and Gradients: Start by applying a flat base color to each part of your creature, then add gradients to create a sense of volume.
- Blending Colors: Use Procreate’s blending tools to softly merge colors, ensuring smooth transitions between different hues and shades.Choose Your Watercolor Brushes:
First Layer of Color:
When starting to add color to your artwork, it’s essential to choose the right watercolor brushes to achieve the desired effect. Procreate offers a diverse range of brush options that mimic real watercolor strokes, complete with digital versions of wet-on-wet and wet-on-dry techniques. Experiment with these brushes to see how they interact with your base layers and vary in terms of softness, opacity, and blending capacity. Understanding how each brush works will help you decide the best one for applying initial washes and building up layers of color.
The first layer of color, often referred to as the “wash,” sets the foundation for your piece. Begin by selecting a light, transparent hue that will act as an underpainting. Apply this color uniformly across the relevant areas of your drawing, paying close attention to natural light sources and where shadows and highlights may fall. This base layer should be light and airy, as it will help guide your subsequent layers. Allow the wash to dry before adding more layers to prevent unwanted blending or muddying of colors, especially when aiming for a more controlled, realistic effect.
With the base layer in place, it’s time to build depth using additional layers of color. Gradually darken specific areas to define the shapes and enhance the three-dimensionality of your creature. Utilize Procreate’s blending tools to mix colors seamlessly, creating smooth transitions and avoiding harsh lines. This layering process is crucial for achieving a lifelike appearance, as it allows you to emphasize textures, such as the rugged terrain of scales or the subtle gradations in skin tone. Be patient and build up the layers slowly, periodically stepping back to assess the overall balance and coherence of your colors.
Build Up with Midtones and Shadows:
Begin by adding midtones to establish the form and volume of your drawing. Midtones are the intermediate values that provide a transition between your lightest lights and darkest darks. Select colors that are slightly darker than your base wash but not as dark as your deepest shadows. Apply these midtones to areas of your creature where the light doesn’t hit directly, such as the undersides of limbs or the recessed parts of its anatomy. Use a medium-soft brush for smooth application, and adjust the opacity settings to allow the underlying layers to show through. This technique will add dimensionality without completely obscuring your base color.
Next, focus on incorporating shadows to enhance the realism of your composition. Shadows are critical for indicating the light source and adding drama to your piece. Choose a darker shade that complements your midtones and base layer. Apply this color sparingly along the edges where parts of your creature overlap or where there are natural depressions. The aim is to create a gradient between the midtones and shadows, so blend the edges carefully to avoid harsh lines. Procreate’s smudge tool can be particularly effective here, as it allows for gentle blending while maintaining texture.
Attention should also be given to reflected light and ambient occlusion. Reflected light occurs when light bounces off surrounding surfaces and slightly illuminates the shaded parts of your subject. This effect is subtle but adds to the believability of your work. Use a lighter color than your midtones, and apply it delicately to the darker areas that might catch some bounced light. Ambient occlusion, on the other hand, is the effect of light being blocked in crevices and points where surfaces meet. Deepen these areas using your darkest shadows, enhancing the intensity and contrast in your drawing.
Integration of these layers—midtones, shadows, and reflected light—creates the intricate balance needed for a naturalistic portrayal of your subject. By meticulously building up these values, you give your drawing a convincing three-dimensional appearance. Regularly zoom out to view your artwork as a whole, ensuring that all elements work cohesively together. This step-by-step approach ensures a well-rounded and dynamic final piece, with each layer contributing to the depth and richness of your digital painting.
Highlighting and Textures:
Highlights should be carefully considered, as they can bring a sense of brilliance and volume to your digital painting. Begin by identifying the light source in your scene and consider where the light would naturally hit your subject. Using a bright color that stands out against your midtones and shadows, apply highlights sparingly to the highest points of your subject where light is most likely to strike directly. This could include protruding edges, such as the tops of muscles, the tips of fur, or metallic surfaces. Be cautious not to overdo highlights, as too many can flatten an image. The aim is to create a focal point that guides the viewer’s eye through the artwork.
Textures, meanwhile, bring a level of realism and detail that can profoundly affect the viewer’s immersion in your piece. Depending on the subject of your drawing, various textures can be achieved by employing different brush techniques and settings within Procreate. For skin, use a stippling technique with a medium-soft brush, slowly building up layers to create a porous and natural skin texture. Fur and hair require lighter, more rapid strokes to mimic the thin and individual strands. Adjusting the brush’s opacity and pressure sensitivity as you paint can help in achieving a more realistic texture. Don’t hesitate to use reference images to understand and replicate the minute details of varied textures.
By constantly refining these aspects and integrating them cohesively, your digital painting will possess a remarkable sense of depth and tactile richness. This attention to detail invites the viewer to not merely see, but almost feel the texture of your subject, making your art both visually striking and emotionally resonant. Regular practice and exploration of different tools and techniques will improve your mastery, allowing for continuous growth and stunning digital artwork.
Blend and Smooth:
Blending and smoothing are essential for creating seamless color transitions in digital painting, with Procreate offering tools like the soft brush and smudge tool for achieving smooth gradients and natural color merging. Employing a circular motion with the soft brush and subtle use of the smudge tool helps avoid harsh lines, enhancing realism and cohesion in your artwork.
Understanding the relationship between light and shadow is crucial for realistic blending, enabling accurate depictions of how light interacts with surfaces. Practicing transitions from highlights to shadows across various shapes improves control and precision, as does adjusting brush opacity and flow, ultimately elevating the quality of your digital paintings.
Utilizing layers, layer masks, and the Gaussian Blur feature in Procreate allows for independent adjustment of highlights, midtones, and shadows, ensuring precise blending and a refined look. Through consistent practice and mastery of these techniques, artists can create captivating, realistic digital paintings that engage viewers.
Mastering digital painting in Procreate requires dedication, practice, and a keen understanding of various techniques and tools. From honing your sketching abilities to embracing the depth of texture, from blending colors seamlessly to applying final touches with precision, each step is integral to creating captivating and professional digital art. Whether you are a novice or a seasoned artist, continually exploring and experimenting within the app will unlock new levels of creativity and technical prowess. Remember, the journey of mastering digital painting is an ongoing process, filled with opportunities to grow and refine your artistic voice.
Elevate Your Art with Procreate Watercolor Brushes by AF Brush Packs
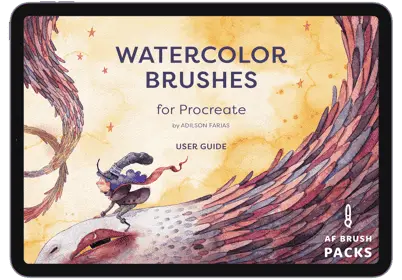
Elevate your Procreate sessions with our meticulously designed watercolor brushes, crafted to mimic the fluidity and subtlety of traditional watercolors. Experience precise control and unparalleled responsiveness, allowing for effortless blending, layering, and texture creation that brings you as close to real watercolor as digital art can achieve.
Embrace the most of your Procreate experience with results that are as professional with AF Brush Packs!