Botanical Beauties: A Tutorial on Watercolor Floral Illustrations in Procreate
Welcome to this complete guide to mastering watercolor floral illustrations in Procreate. This tutorial will provide a detailed, step-by-step approach, ensuring that you understand the fundamental techniques and tools required to create stunning botanical artwork. From the initial sketch to the final touches, we will cover every aspect of the creative process. Whether you are a beginner just starting out or an experienced artist looking to refine your digital watercolor skills, this guide will offer valuable insights and practical tips to elevate your artwork to the next level.
Table of Contents
Toggle
You’ll learn about the best brushes to use, how to layer colors effectively, and the nuances of blending to achieve realistic effects. We’ll also explore advanced techniques, such as adding texture and depth, to make your illustrations truly stand out. By the end of this guide, you’ll have the confidence and knowledge to create your own beautiful floral illustrations that capture the essence of the natural world.
Select the right Brushes
Choosing the right brushes is a crucial step in creating beautiful watercolor floral illustrations in Procreate. Each brush offers different textures and effects, which can significantly impact the overall look and feel of your artwork. For watercolor illustrations, it is essential to select brushes that mimic the fluid and translucent qualities of traditional watercolor paint.
Start by exploring the default Procreate brushes, particularly those within the ‘Watercolor’ section. Brushes such as ‘Watercolor Brush’, ‘Fine Tip’, and ‘Soft Wash’ are excellent starting points for achieving the foundational washes and delicate details needed in botanical illustrations. Additionally, consider using custom brushes created by other artists, which can often be found in online resources or digital art communities. These custom brushes can provide unique textures and versatile strokes that enrich your illustrations.
Understanding how to adjust brush settings is equally important. Modifying parameters like opacity, flow, and size can help you simulate the variation in brush strokes that is characteristic of traditional watercolor painting. Practice with different settings to discover which combinations work best for your style and the specific aspects of your illustration, whether it’s adding fine details to a petal or creating a smooth gradient for a background wash.
To summarize, selecting the right brushes involves experimenting with both default and custom options and fine-tuning their settings to suit your artistic vision. Mastering the use of these brushes will allow you to create intricate, lifelike watercolor floral illustrations that truly capture the beauty of nature.
Colour Palette
Selecting an appropriate color palette is a crucial step in creating authentic and visually appealing watercolor floral illustrations. Begin by observing real botanical specimens to understand the natural color variations and subtle hues present within flowers and foliage. This real-life study will provide you with a foundational understanding of color relationships and inspire your palette choices.
In Procreate, create custom color palettes to streamline your workflow and maintain consistency throughout your illustration. You can start by selecting a base color for each element of your illustration, such as the primary petal color, foliage shades, and any accent colors for stamens or other features. Utilize the color wheel to make harmonious adjustments, ensuring your colors are well-coordinated.
Additionally, explore the use of complementary and analogous color schemes to add depth and vibrancy to your artwork. Complementary colors, which are opposite each other on the color wheel, can be used to create striking contrasts and highlight focal points. Analogous colors, which are adjacent on the color wheel, can help achieve a more cohesive and soothing effect.
Fine-tuning the transparency and layering of colors is also paramount in mimicking the natural translucency found in traditional watercolor paintings. Use the blending and smudging tools in Procreate to create smooth transitions and soft gradients, enhancing the realism of your illustrations.
Paper Textures
Paper textures play a significant role in achieving the desired effects in watercolor floral illustrations. When creating digital illustrations in Procreate, it is essential to understand how different textures can influence the overall appearance of your artwork. Begin by exploring the various paper texture options available in the app. These textures can range from smooth to rough, each having unique characteristics that can affect the way colors appear and blend.
A smooth paper texture will allow for clean edges and precise details, making it ideal for intricate elements within your illustration. Conversely, a rough paper texture will add a more organic feel, mimicking the fibrous quality of traditional watercolor paper. This can be particularly advantageous when aiming to replicate the unpredictable and natural flow of watercolor paint.
To implement paper textures in Procreate, start by creating a new layer and importing or applying a high-resolution paper texture. Adjust the opacity and blending mode of the texture layer to integrate it seamlessly with your illustration. Experiment with different textures and settings to identify which combination best complements your intended style.
Watercolor Techniques on Procreate
Mastering watercolor techniques in Procreate requires a thorough understanding of the tools and functionalities that the app provides. Here are several key techniques to consider:
Wet-on-Wet Technique
This technique involves applying wet paint onto a wet surface, which can be emulated in Procreate by using brush settings that mimic the diffusion of watercolor pigments. Begin by selecting a watercolor brush and adjusting its flow and dilution settings to achieve a wet effect. Apply a base layer of color, ensuring it looks sufficiently wet. Then, introduce additional colors onto this wet layer to see them blend and spread, creating smooth transitions and natural gradients.
Wet-on-Dry Technique
In contrast, the wet-on-dry technique involves applying wet paint onto a dry surface. To replicate this in Procreate, use a watercolor brush with a firmer texture and lower dilution. This will allow your strokes to retain sharper edges and more defined lines. This technique is particularly effective for adding details and depth after establishing your base layers with the wet-on-wet technique.
Lifting and Erasing
One of the advantages of digital art is the ability to lift or erase paint with precision. In Procreate, this can be accomplished using the eraser tool or by manipulating the opacity and blending modes. To lift paint, select the eraser tool with a soft brush and lightly stroke over areas where you wish to reduce color intensity. Adjust the brush settings to achieve subtle or more distinct lifting effects, simulating the lightening of areas as you would with a dry brush or tissue in traditional watercolor.
Layering and Glazing
Building up colors through multiple layers is a fundamental watercolor technique that can be easily executed in Procreate. Begin with light, translucent layers to establish your foundation. Gradually add subsequent layers, each with slightly increased opacity or deeper colors, allowing the underlying layers to show through. This technique, known as glazing, creates rich, luminous effects and enhances the depth and realism of your illustration.
Step-by-Step Drawing of a Flower in Procreate
Step 1: Drawing the Stem
Begin by selecting a watercolor brush appropriate for digital painting. Set the brush size to a medium width and choose a green color for the stem. Start from the bottom of the canvas and draw an upward curved line to create a natural, organic look for the stem. Vary the pressure to simulate the natural thickness and thinness of a real stem.
Step 2: Adding Leaves
Next, select a slightly darker or lighter shade of green for the leaves. Use a finer brush to draw elongated, curved shapes extending from both sides of the stem. Apply the wet-on-wet technique by lightly blending the edges to create a smooth transition. Add details such as veins by drawing thin lines within the leaves using a darker green.
Step 3: Drawing the Bud
For the flower bud, choose a bright color such as yellow or pink. Use a medium-sized brush to draw an oval shape at the top of the stem. Apply light, circular strokes to represent the inner parts of the bud. You can use a different watercolor brush to add texture and depth, simulating petals that are just beginning to open.
Step 4: Painting the Petals
Select a lighter shade of your chosen bud color and begin painting the petals. Use broad, sweeping strokes to create the petals extending outwards from the central bud. Apply the wet-on-wet technique to blend the colors where the petals overlap. Adjust the brush opacity for more transparent edges, adding realism to the petals’ appearance.
Step 5: Adding Details
Once the basic structure is complete, switch to a smaller brush to add intricate details such as petal veins and fine lines. Use a slightly darker color to add shadows and a lighter color to highlight areas where the light hits the petals. This will enhance the three-dimensional look of the flower.
Step 6: Final Touches
Complete your drawing by refining the overall image. Adjust the brush sizes and colors as needed to bring out more details and correct any inconsistencies. You can use the lifting and erasing techniques to lighten areas or correct mistakes. Finally, apply the layering and glazing technique to enrich the colors and create a more vibrant and dynamic flower illustration.
Transparency Mode
One of the unique features of Procreate is its Transparency Mode. This mode allows you to paint and draw on separate layers without affecting the layers below. For example, you can use a textured brush on one layer to create the petals’ rough texture, then switch to a smoother brush on another layer for the center bud.
This feature gives you more control over your drawing process and allows for easier editing and adjustments. You can experiment with different colors, textures, and techniques without worrying about ruining your entire drawing.
Line details and final touches
To add more depth and dimension to your flower illustration, you can use a fine liner brush to draw intricate lines and details. These include the petal veins, stamen, and pistil. You can also use this brush to refine any rough edges or correct any mistakes.
Additionally, you can add final touches such as highlights and shadows using lighter and darker colors respectively. This will bring out the various layers of the flower and make it look more realistic.
Elevate Your Art with Procreate Watercolor Brushes by AF Brush Packs
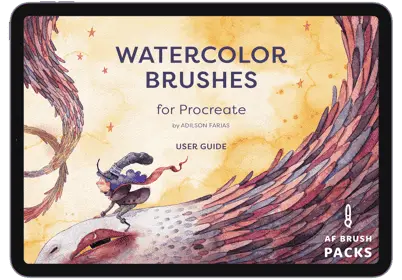
Unlock new levels of creativity and precision in your artwork with Procreate Watercolor Brushes from AF Brush Packs.
These brushes are engineered to emulate the dynamic and fluid character of traditional watercolor media, catering to artists seeking authenticity and depth in their digital creations. With these premium tools, experience unparalleled responsiveness and versatility that bring your ideas to life.
Elevate your digital art today with AF Brush Packs and transform your canvas into a masterpiece.