Animating Your Watercolors: Bringing Illustrations to Life with Procreate
Watercolor illustrations have a timeless appeal, with their delicate shades and organic textures captivating artists and audiences alike. But what if you could add an extra dimension to your creations by infusing them with movement? In this guide, we will explore how to animate your watercolor illustrations using Procreate, a powerful and user-friendly digital art app. Whether you’re a seasoned illustrator or a beginner looking to expand your skill set, this tutorial aims to provide you with the tools and techniques to bring your artwork to life, creating animations that are as dynamic as they are beautiful.
Table of Contents
Toggle
Step-by-Step Guide to Animating in Procreate
Step 1: Set Up Your Canvas
Begin by opening Procreate on your iPad and creating a new canvas. To ensure that your animation runs smoothly, choose a canvas size and resolution that suits your project. It’s generally recommended to work with a resolution of at least 72 DPI.
Step 2: Import or Create Your Watercolor Illustration
In this step, you have two primary options: you can either import an existing watercolor illustration or create a new one directly within Procreate. If you have already painted your watercolor illustration on paper, use a high-quality scanner or camera to capture a digital version of your artwork. Once you have the digital file, import it into Procreate by selecting the “Add” option in the Actions menu and choosing “Insert a photo.” Position and scale your image as needed to fit your canvas.
Alternatively, you can create a new watercolor illustration from scratch using Procreate’s array of brushes and tools. Procreate offers various brush sets that mimic traditional watercolor techniques, allowing you to achieve the desired texture and translucency. Spend some time experimenting with Procreate’s brush settings to find the perfect combination that replicates the organic feel of watercolor. Whether you’re importing or creating anew, having your illustration ready on the Procreate canvas is essential before moving on to the animation process.
Step 3: Access the Animation Assist
To start animating your watercolor illustration, you’ll need to activate Procreate’s Animation Assist feature. Here’s a step-by-step guide to accessing it:
- Open the Actions Menu: Tap the wrench icon located at the top left corner of the screen to open the Actions menu.
- Navigate to the Canvas Tab: Within the Actions menu, find and select the “Canvas” tab.
- Enable Animation Assist: Scroll down within the Canvas tab until you see the “Animation Assist” option. Toggle this option on by tapping the switch next to it.
Once Animation Assist is enabled, a new toolbar will appear at the bottom of the screen. This toolbar provides various controls and options essential for creating your animation, such as adding and managing frames, adjusting frame rates, and previewing your animation. With Animation Assist activated, you’re ready to start bringing your watercolor illustration to life!
Step 4: Start Creating Animation Frames
Creating animation frames in Procreate is where your static illustration begins to come to life. Follow these steps to start animating:
- Add a New Frame: Tap the “+” button in the Animation Assist toolbar to add a new frame. Each frame in Animation Assist represents a different stage of your animation.
- Draw Your Illustration on the New Frame: Use the same brushes and techniques you used for your original watercolor illustration to maintain consistency. Draw slight changes to your illustration on the new frame to create the illusion of movement.
- Utilize Onion Skins: Onion skins are semi-transparent overlays of the previous and next frames, allowing you to see the progression of your animation and make precise adjustments. You can adjust the visibility of onion skins by tapping the settings icon in the Animation Assist toolbar and tweaking the “Onion Skin Frames” and “Opacity” sliders.
- Review Your Animation: Tap the play button in the Animation Assist toolbar to preview your animation. This helps you identify any frames that might need more tweaking or re-drawing.
Tips for Illustrating Animation Frames
- Consistency is Key: Ensure that the style and texture of your illustrations stay consistent across all frames. This maintains the fluidity and cohesion of the animation.
- Keep Movements Simple: When starting out, stick to simple movements and actions. This helps you learn the basics of animation without getting overwhelmed.
- Use Layer Groups: Group related layers together. For example, if you’re animating a character, group the layers for the head, body, and limbs separately. This makes it easier to manage complex animations.
- Incremental Changes: Make small, incremental changes between frames. Larger changes can make the animation look choppy and disjointed.
- Leverage Blending Modes: Utilize Procreate’s layer blending modes to add subtle effects and transitions, enhancing the fluidity of the animation.
Once you’re comfortable with these basics, you can start experimenting with more complex animations and advanced techniques, such as adding backgrounds or integrating multiple animated elements. Each frame you create adds depth and dimension, making your watercolor illustration come to life with vibrant, fluid motion.
Step 5: Adjust Frame Properties
Adjusting frame properties is an essential part of refining your animation in Procreate. This step involves fine-tuning the timing and pacing of your frames to ensure smooth motion and coherence in your animation. Here are several key aspects to consider when adjusting frame properties:
- Frame Duration: This determines how long each frame is displayed before transitioning to the next one. By increasing the duration of a frame, you can emphasize specific moments or actions within your animation. Conversely, decreasing the duration can speed up movement, creating a sense of quick action or urgency. To adjust frame duration, select the frame in the Animation Assist toolbar and modify the timing settings.
- Frame Rate: This refers to the number of frames displayed per second. A higher frame rate results in smoother animations but requires more frames to be drawn. Procreate allows you to adjust the frame rate in the Animation Assist settings, enabling you to find the perfect balance between fluidity and workload. Standard frame rates for animation can range between 12 to 24 frames per second, with 24 fps being typical for professional-quality animations.
- Playback Speed: Beyond just individual frame adjustments, you can modify the overall playback speed of your animation. This is particularly useful for creating slow-motion effects or speeding up sequences to match the desired pace of your project.
- Looping Options: Procreate provides multiple looping options, such as “Ping-Pong” which plays the animation forward and then in reverse, creating a seamless loop. This can be particularly effective for animations that need to cycle continuously. Exploring different looping styles can add variety and interest to your animations.
- Onion Skinning: While adjusting frames, use the Onion Skin feature to see multiple frames at once. This visual guide helps you maintain consistency in movement and positioning. You can tweak the visibility of onion skins through the opacity slider in the Animation Assist settings.
Fine-tuning these properties allows you to control the rhythm and pace of your animation, ensuring that the end result matches your creative vision. As you gain more experience, you’ll become adept at manipulating these settings to produce polished and professional animations.
Step 6: Add Motion Dynamics
Adding motion dynamics to your animation is essential for creating a lifelike and engaging experience. This step involves introducing principles such as easing in and out, squash and stretch, and anticipation. Easing in and out, often referred to as “slow in and slow out,” makes movements start slowly, accelerate, and then decelerate, which adds a natural flow to the animation. The squash and stretch technique exaggerates the deformation of objects to convey weight and flexibility, lending a vibrant and dynamic quality to your animations. Anticipation prepares the audience for a major action, ensuring that movements appear deliberate and well-timed. By mastering these principles, you’ll enhance the believability and appeal of your animations, making them more dynamic and engaging.
Step 7: Preview and Refine Your Animation
Previewing and refining your animation is a critical stage in the animation process. This step involves carefully reviewing the entire sequence of frames to ensure that the animation flows smoothly and meets your creative objectives. By playing back your animation in real-time, you can identify any inconsistencies or areas that require adjustment. Pay close attention to timing, transitions, and the overall cohesiveness of the movement. Make necessary tweaks to correct any faults, such as adjusting the timing of certain frames, refining the motion dynamics, or adding missing details. This iterative process of review and refinement is essential for achieving a polished and professional final product, as it allows you to fine-tune every aspect of the animation to perfection.
Step 8: Add Final Touches
Adding final touches to your animation is where you elevate your work from good to outstanding. This stage involves enhancing the visual and auditory elements to create a cohesive and immersive experience for the audience. Begin by ensuring that your characters and objects are polished, with clean lines and consistent shading. Next, incorporate special effects such as shadows, highlights, and reflections to add depth and realism. Pay attention to the background and environment, filling in details that complement the main action without distracting from it.
Sound also plays a vital role in bringing your animation to life. Appropriate sound effects and background music can significantly enhance the emotional impact and narrative flow. Sync your audio perfectly with the animation to make every movement and action more compelling. Additionally, consider adding ambient sounds to create a more believable setting.
Finally, review your animation once more to check for any elements that might have been overlooked. Small adjustments such as fine-tuning colour balance, sharpening images, and ensuring smooth transitions can make a significant difference. By meticulously adding these final touches, you ensure your animation is polished, captivating, and ready to impress your audience.
Step 9: Export Your Animation
Once you’re satisfied with your animation, it’s time to export it. Tap the Actions menu, then select the Share tab. Choose from various export options, such as animated GIF, PNG sequence, or MP4. Adjust settings according to your preferences before finalizing the export.
Step 10: Share Your Work
Share your animated watercolor illustration with your audience via social media, a personal website, or an online portfolio. Enjoy the process of seeing your static artwork come to life and engage viewers in a new, dynamic way.
Animation is a constantly evolving field with new techniques, technology, and trends emerging all the time. As an animator, it’s crucial to keep learning and experimenting to stay ahead of the game. Take online courses, attend workshops, and engage with other animators to exchange ideas and learn from each other. By continuously improving your skills, you can create even more impressive watercolor animations in the future.
Discover the Procreate Watercolor Brushes of AF Brush Packs
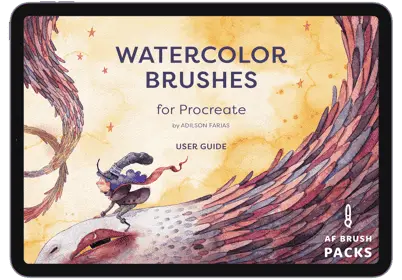
Discover the unmatched versatility of Procreate Watercolor Brushes by AF Brush Packs. Perfect for artists aiming to blend the traditional watercolor essence with digital artistry. With these brushes, transform your digital canvas into a masterpiece, effortlessly achieving lifelike watercolor effects. Ideal for both novices and professionals, this collection is your gateway to creating awe-inspiring digital watercolor art with ease and precision.
Elevate your art now – explore, experiment, and express with AF Brush Packs.