Mastering Atmospheric Effects: Fog, Rain, and Mist with Watercolor in Procreate
Welcome to this guide on using watercolor in Procreate to master atmospheric effects. This tutorial is designed for artists and enthusiasts wanting to boost their digital painting skills, especially in creating realistic fog, rain, and mist. By using watercolor techniques in Procreate, you’ll learn how to capture the fleeting beauty of these atmospheric elements, turning your digital canvas into a lively depiction of nature’s delicate moods. Whether you want to add mystery or tranquility to your art, this guide will give you the tips and tools to take your digital creations to the next level. Get ready to dive into a creative journey that blends the fluidity of watercolor with the accuracy of digital art.
Table of Contents
Toggle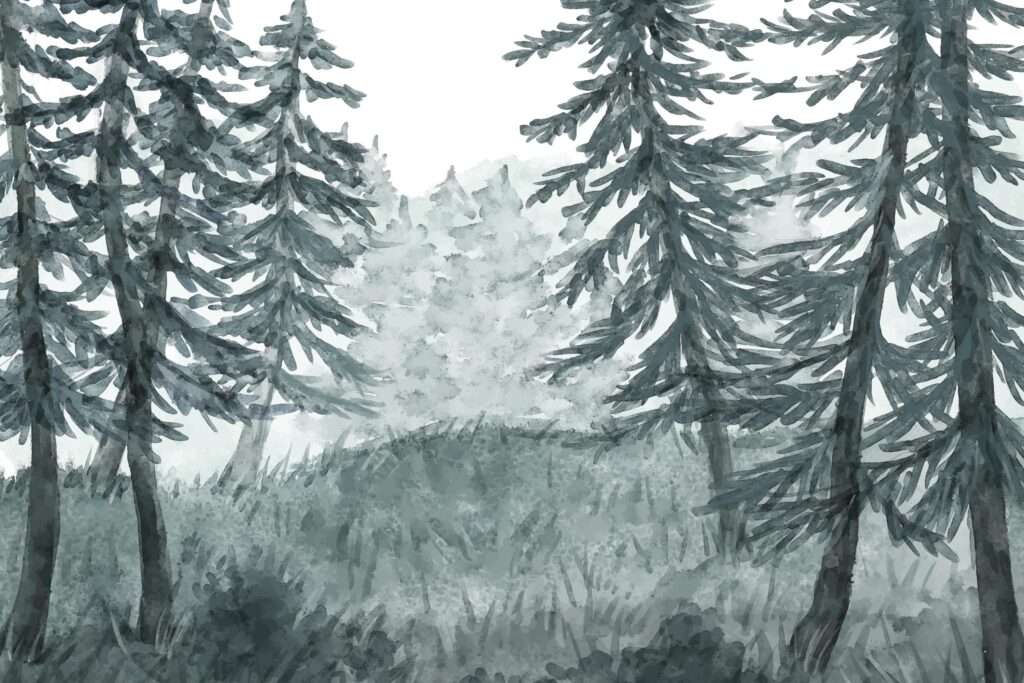
Understanding Procreate’s Interface for Atmospheric Effects
To effectively create atmospheric effects like fog, rain, and mist in Procreate using watercolor brushes, it’s essential to familiarize yourself with the interface and available tools. Start by opening Procreate and creating a new canvas. You’ll find several features necessary for this process:
- Brush Library: Navigate to the Brush Library where you’ll find various watercolor brushes. These are crucial for mimicking the diffuse and translucent nature of atmospheric effects.
- Layers Panel: Use the Layers Panel to manage different aspects of your painting. This allows you to work on individual elements like fog, rain, and mist separately, making it easier to adjust each component without affecting the others.
- Opacity Slider: Adjusting opacity is key to creating convincing atmospheric effects. This slider helps in controlling the transparency of your brush strokes, which is essential for achieving the delicate nuances of fog and mist.
- Blend Modes: Utilize different blend modes to enhance the interaction between layers. For example, the “Overlay” or “Soft Light” modes can create more subtle and realistic effects.
- Color Wheel: Choose a muted color palette to maintain the soft and diffused look typical of atmospheric phenomena. Light greys, blues, and greens often work best for creating natural-looking effects.
Choosing the Right Brushes
Selecting the appropriate brushes is fundamental to achieving realistic atmospheric effects in Procreate. Watercolor brushes are particularly effective for this purpose due to their inherent ability to simulate the delicate nature of elements like fog, rain, and mist. When choosing brushes, consider the following:
- Brush Textures: Opt for brushes with soft, diffuse textures to replicate the subtle appearance of atmospheric phenomena. Brushes that mimic natural media such as watercolor washes or light gouache are excellent choices.
- Brush Settings: Customize your brush settings to enhance softness and fluidity. Adjusting parameters such as flow, jitter, and falloff can help create more authentic effects.
- Premade Brush Sets: Explore Procreate’s selection of premade brush sets specifically designed for atmospheric effects. These sets often include brushes tailored for different weather conditions and can serve as a great starting point.
- Creator Community: Leverage brushes created by the Procreate community. Many artists share their custom brushes online, providing a wide range of textures and effects that can be employed in your artwork.
By carefully selecting and adjusting your brushes, you can produce more lifelike and dynamic atmospheric effects that enhance the overall mood and realism of your digital paintings.
Creating Fog in Procreate
Creating fog in Procreate involves a blend of artistic theory and practical tips to simulate this atmospheric condition accurately. Fog adds mood, depth, and mystery to a scene, and mastering its depiction can significantly improve your digital painting skills. Here’s a detailed guide on how to achieve realistic fog effects:
Understanding Fog
Fog is essentially a thick cloud of tiny water droplets or ice crystals suspended near the earth’s surface, reducing visibility. To recreate fog, you must comprehend its visual characteristics:
- Opacity and Density: Fog typically appears semi-transparent, with varying levels of density throughout the scene.
- Soft Edges: The edges of fog are generally soft and blend smoothly into the surrounding area.
- Color and Tone: Fog often has a greyish or bluish tint, influenced by the ambient light and environmental colors.
Practical Tips for Creating Fog
- Layering Technique:
- Base Layer: Start with a base layer for your primary artwork. This should include your landscape or scene upon which the fog will settle.
- Fog Layers: Add multiple layers on top of your base, each representing a different density and area of fog. Use a lower opacity for these layers to keep the fog semi-transparent.
- Brush Selection:
- Use soft, diffuse brushes that mimic natural media such as watercolor or airbrushes. These brushes help achieve the smooth, soft edges characteristic of fog.
- Consider using Procreate’s premade fog brushes or downloading custom fog brushes from the Procreate community to simplify the process.
- Adjusting Opacity and Flow:
- Lower the opacity of your brushes to create translucent fog effects. Adjusting the flow rate can also control the concentration of fog in specific areas.
- Start with a light application and gradually build up the fog density to ensure a natural appearance.
- Color Matching:
- Choose colors that reflect the scene’s lighting conditions. For a morning scene, use cooler tones with slight blue or grey tints. For an evening setting, warmer tones may be more appropriate.
- Incorporate subtle variations in color to add depth and realism to your fog.
- Blurring and Smudging:
- Utilize Procreate’s Gaussian Blur or Motion Blur tools to soften the edges of your fog layers further.
- The Smudge tool can help blend the fog more organically into the background and different elements of your scene.
- Lighting Effects:
- Consider how light interacts with the fog. Use soft brush highlights to create the illusion of light filtering through the fog. This can be particularly effective when depicting areas around light sources like street lamps or the sun.
- Depth and Perspective:
- To create a sense of depth, apply fog more densely in the background and sparingly in the foreground. This technique simulates how fog naturally recedes.
- Use atmospheric perspective, making distant objects less distinct and cooler in color, to enhance the realism.
By applying these tips and understanding the theory behind fog, you can create immersive and realistic atmospheric effects in your digital art using Procreate.
Painting Rain with Watercolor Effects
Creating realistic rain effects with watercolor techniques in Procreate requires a blend of precision and artistic intuition. Watercolor, by its nature, lends itself to depicting the fluid and translucent qualities of rain. Start by selecting a light, transparent brush to mimic the delicate and uneven texture of raindrops. Apply light, vertical strokes to represent falling rain, with variations in pressure to achieve a more natural look. Incorporating splatters with a splatter brush can suggest raindrops hitting surfaces, adding realism to the scene. Additionally, using layers of wet-on-wet techniques can help create the blurred, misty atmosphere often associated with rain-soaked environments. Adjusting opacity and blending modes can further enhance the depth and dynamism of your rain effects, making your watercolor illustrations come alive with the gentle patter of raindrops.
Achieving Misty Atmospheres
To achieve misty atmospheres in Procreate, start by selecting a soft airbrush with low opacity. This brush will help you gradually build up the mist layer by layer. Begin applying the mist in the areas where the effect is most concentrated, typically lower on the canvas to mimic ground fog, or around bodies of water. Gradually increase the density by layering more strokes, ensuring that the edges remain soft and diffuse.
Next, use the Gaussian Blur tool to further smooth out the edges and blend the mist into the surrounding environment. Adjust the opacity of the mist layer to maintain subtlety and prevent it from overpowering the scene. For added realism, incorporate slight variations in color by using cooler, more subdued hues that match the overall color palette of your piece.
To enhance depth, create multiple mist layers at varying opacities and blurriness, placing them at different distances within your composition. This layering technique helps achieve a more immersive and dimensional effect. Finally, experiment with blending modes such as “Soft Light” or “Overlay” to enhance the integration of the mist with the background, lending a cohesive, atmospheric feel to your artwork.
Utilizing Layer Modes for Atmospheric Realism
Layer modes, also known as blending modes, can significantly enhance the realism of atmospheric effects in your artwork. To utilize layer modes effectively, begin by selecting the layer that contains your desired atmospheric element, such as fog, mist, or light rays.
Experiment with different blending modes to see how they interact with the underlying layers. For instance, the “Screen” mode is excellent for creating the illusion of light, as it brightens the layer beneath it. On the other hand, “Multiply” can be useful for darkening and adding shadows, giving a more contrasting and dramatic effect. “Soft Light” and “Overlay” are versatile modes that enhance contrast and saturation, helping to blend your atmospheric elements seamlessly into the scene.
Adjust the opacity of the layer to control the intensity of the effect. Lowering the opacity can create a more subtle, realistic atmosphere, while higher opacity can make the effect more pronounced. Additionally, use layer masks to selectively apply blending modes to specific areas, allowing for precise control over where and how the effect appears.
Combining multiple layers with different blending modes can add complexity and depth to your artwork. For example, you might use a “Screen” layer for light beams and a “Soft Light” layer for mist, merging the two effects harmoniously. Always keep in mind the overall color palette and lighting of your piece, and adjust hues and saturation accordingly to maintain coherence and enhance realism.
Discover the Procreate Watercolor Brushes of AF Brush Packs
When it comes to elevating your digital artwork, AF Brush Packs stand out as a trusted brand among artists. Our Procreate Watercolor Brushes, complemented by bonus paper textures, are designed by the eyes of an artist to bring an unparalleled level of realism and depth to your creations.
Invest in AF Brush Packs today and experience the difference that quality digital tools can make. Transform your creative process and produce artwork that truly stands out. With AF Brush Packs, you’re not just purchasing a product—you’re investing in your artistic journey.